Setting up Git
The first thing you will need to do is set up a BitBucket account. Once you have an account, you should see the CSE431 repository in your profile. If you do not, you should send me an email with your username so that I can give you access to the course repository. Once I have added you to the course repository, you should see this screen when you login to BitBucket:
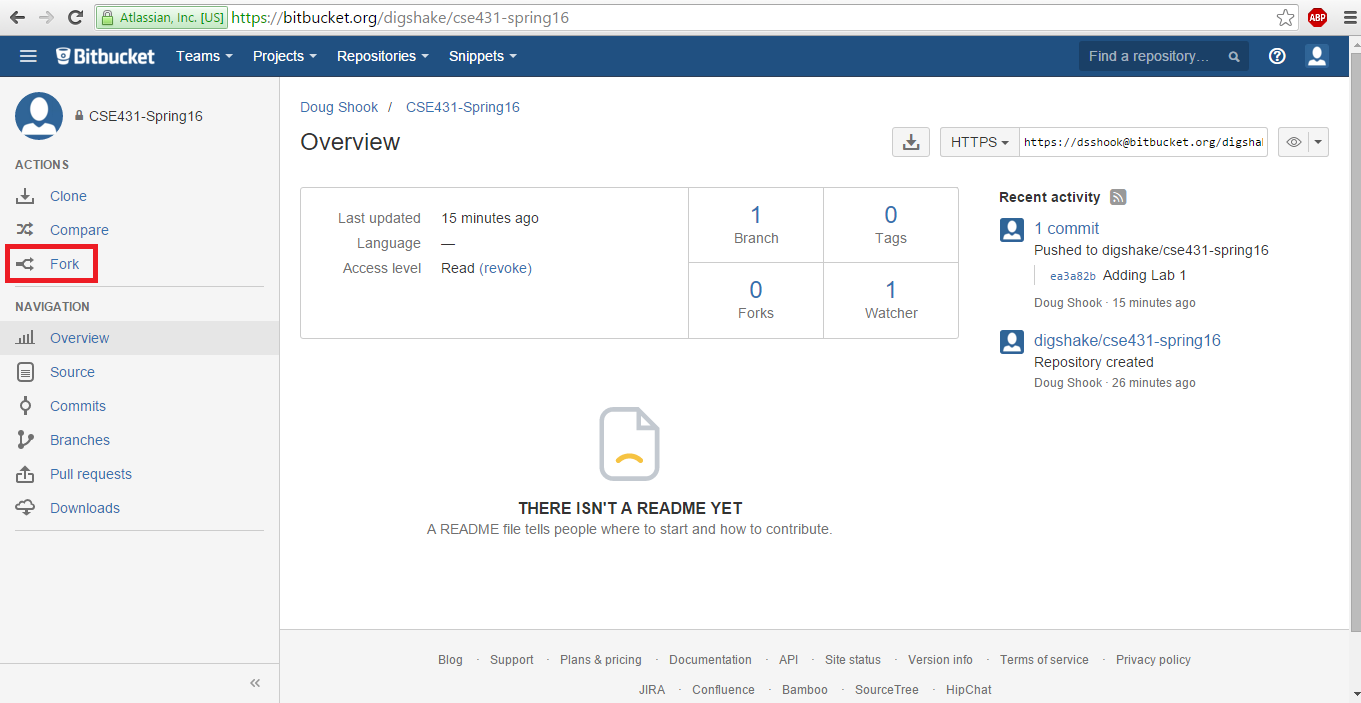
Click on the CSE431 Repo. It will take you to the following page. Click the "Fork" link:
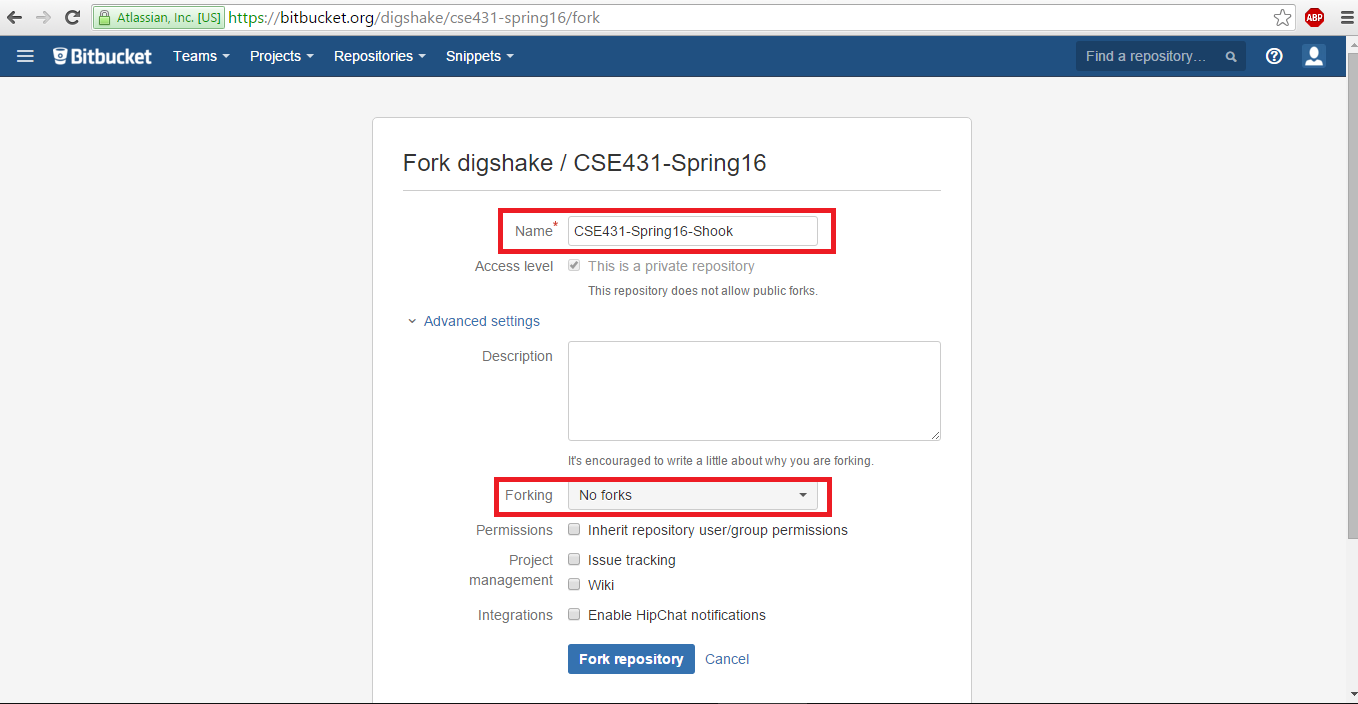
Add your last name to the name of the repository as shown (please do not use my last name!). Set the forking policy to disallow forks.
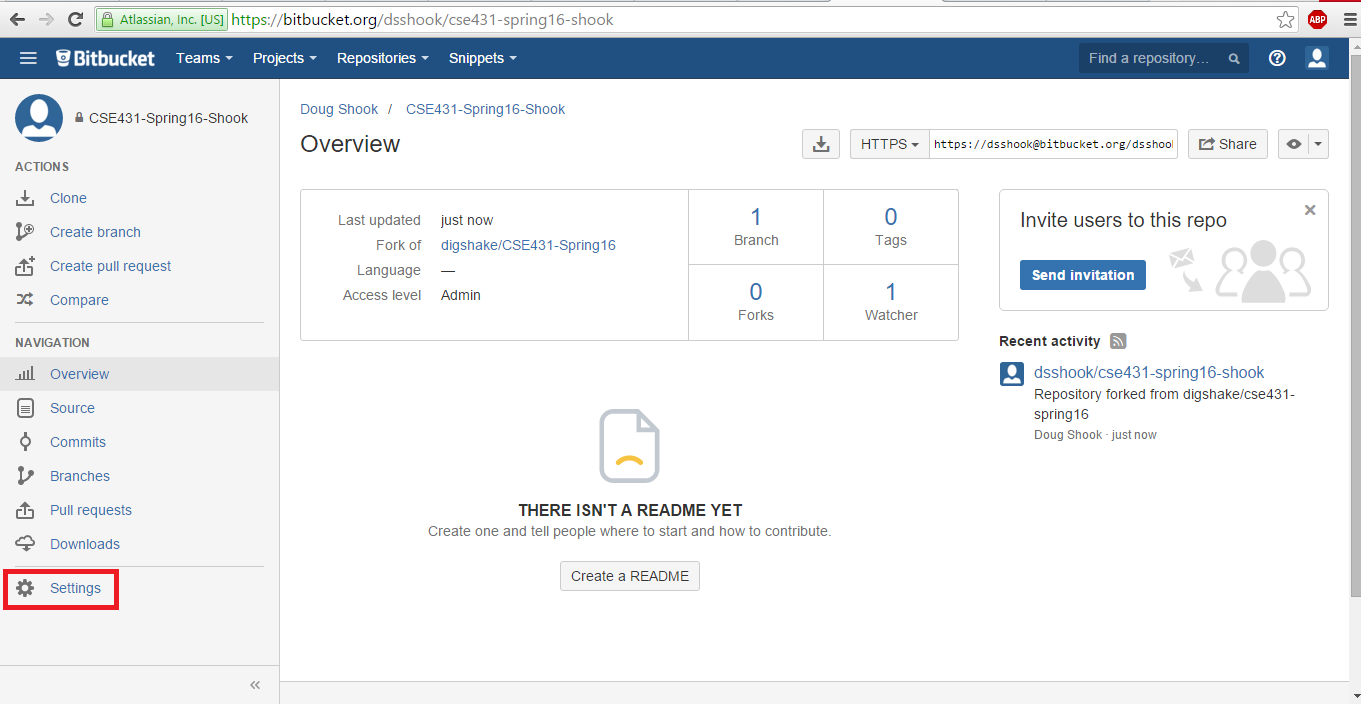
Now navigate to the page for your version of the repository. Click the settings link in the lower left.
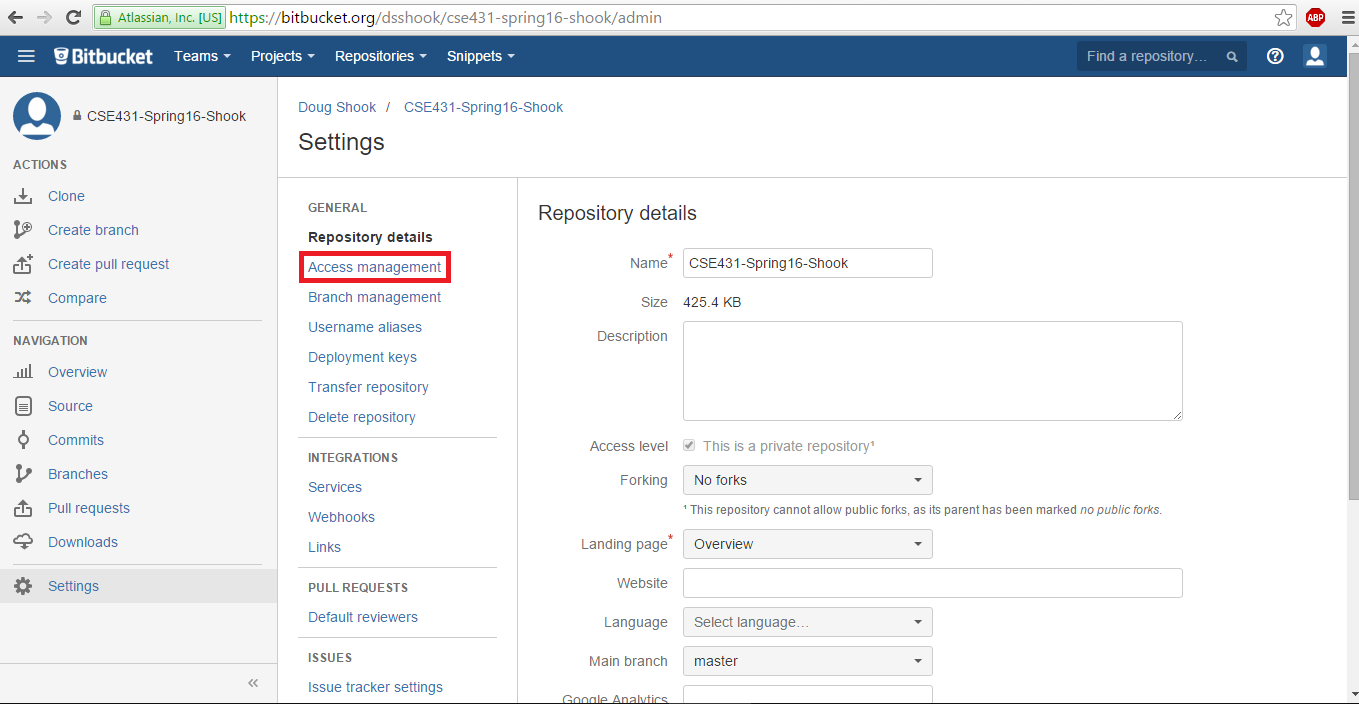
In order for me to see your work you need to give me access to your repository. To do this, select "Access Management" in the settings window:
Next, search for my name, "Doug Shook", and give me admin rights to the repository:
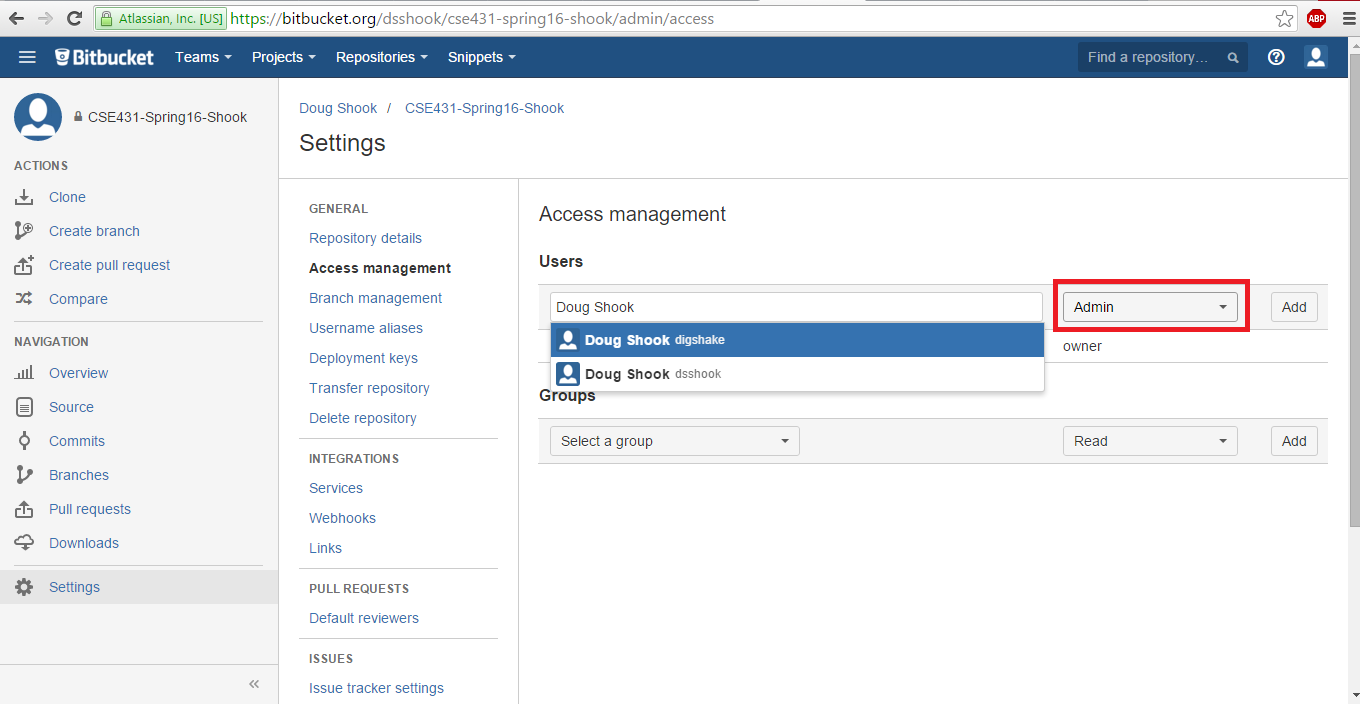
If you are working with a partner and want to share repositories with them, you can add your partner on this screen. Be careful with this. You may have at most one partner added to your repository at a time. If you decide to switch partners you should remove your previous partner before adding your new partner. If you fail to do this it could be considered a violation of the Academic Dishonesty Policy.
Once you have finished setting up your repository on BitBucket, you need to create a clone of your repository on your local machine. To do this, click the clone button on the repository page:
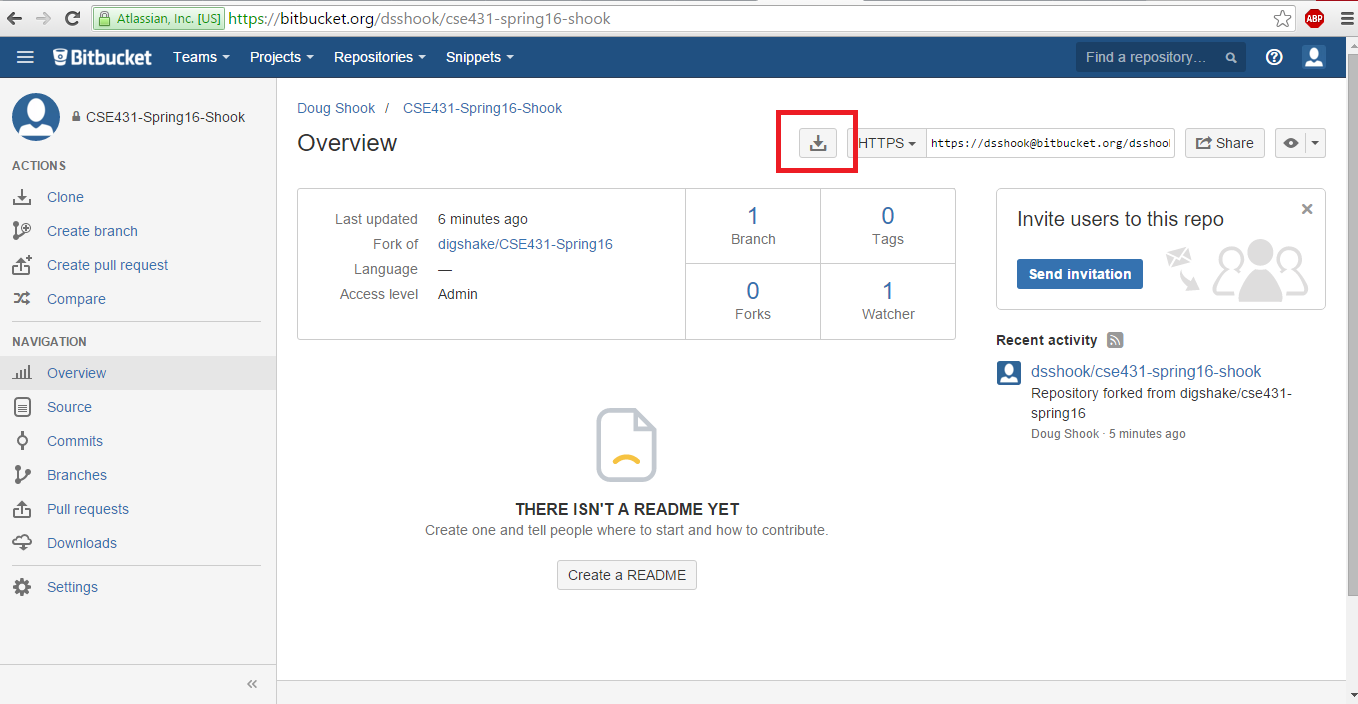
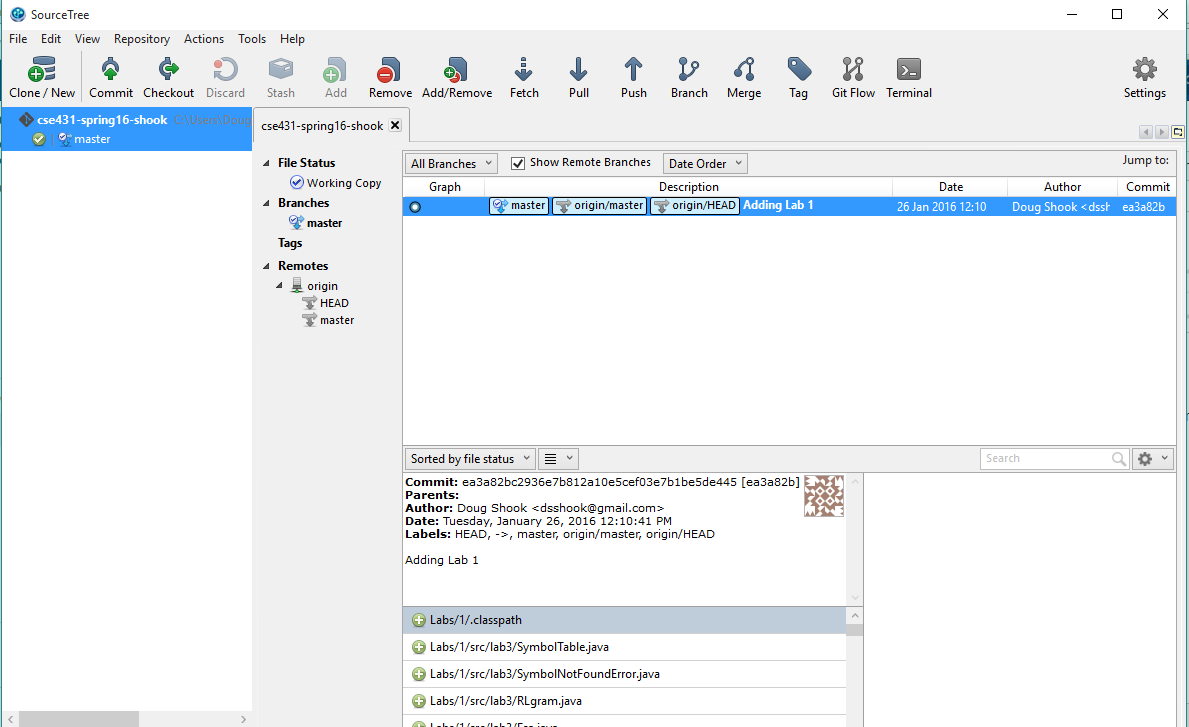
This requires a program called Atlassian SourceTree. If you do not have this program, you will be prompted to install it. Once the program is installed, it will ask if you want to clone the repository. Accept the prompt. Your screen should now look like the following:
In order for me to distribute studios and assignments, you need to connect your repository back to mine. To do this, you need to set up a new remote:
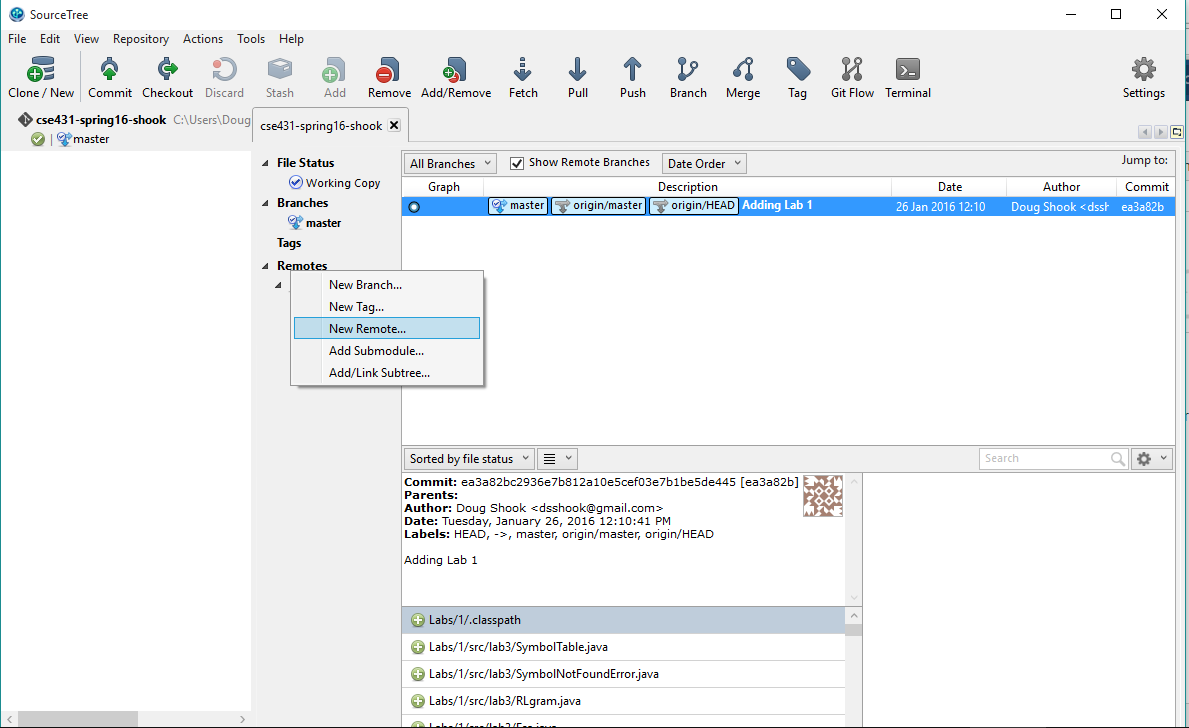
Add a new remote and fill in the details as shown
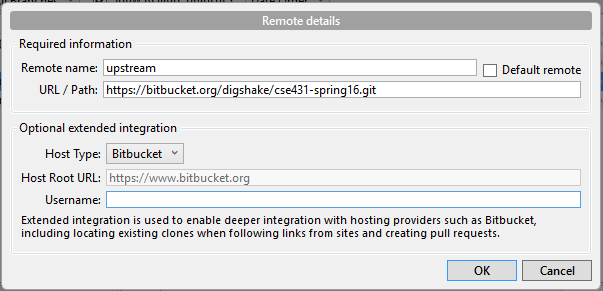
You are now ready to begin working on assignments. To set up your assignment in Eclipse, see the instructions included with Lab 1.
From now on you will be using primarily 3 options:
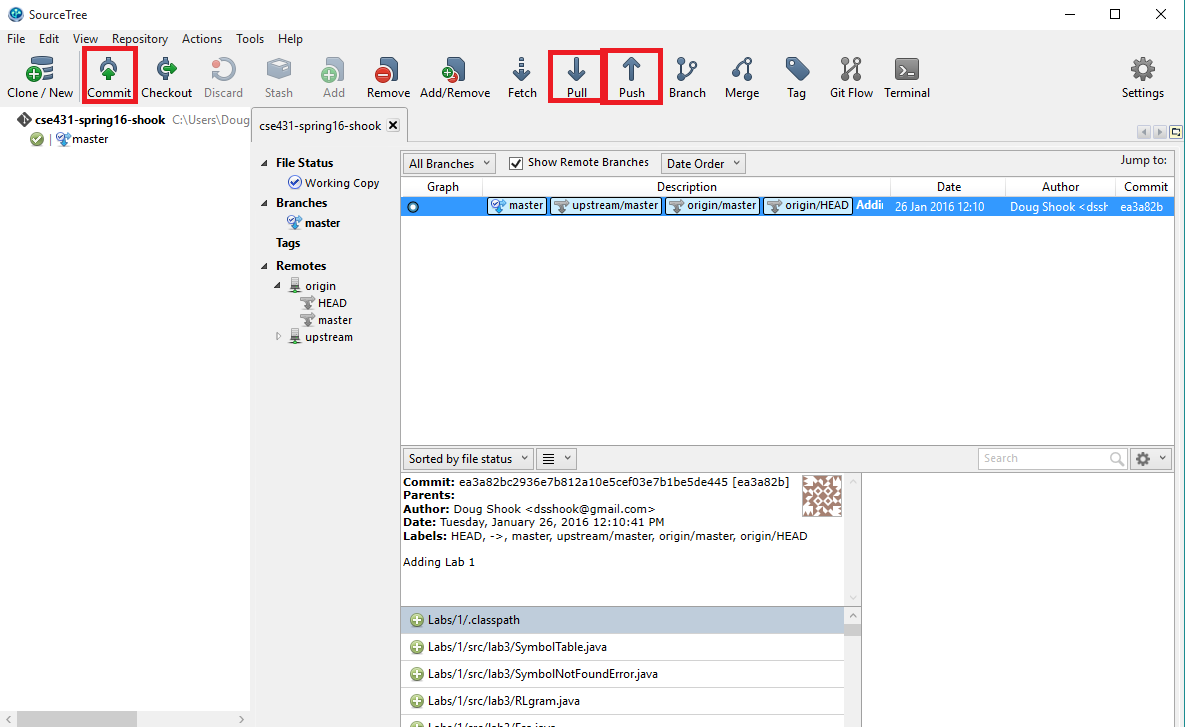
Commit saves a copy of your code locally. Commit does not allow me to see your code!
Pull allows you to get the most up to date version of code from BitBucket. You will need to pull from upstream to get new assignments from me. If you are working with a partner, pulling from origin will get all of the work that your partner has done.
Push sends your code to BitBucket. Pushing your code to origin is how you will submit assignments. If you do not push your code to origin, I will not be able to grade your work. You are not allowed to push to upstream.
More information about git commands and how they work can be found here.